Artbots is really more of a gizmo/gadget project with some scientific reasoning and problem-solving thrown in the mix. With a few simple items from the dollar store plus a little tenacity (not everything goes as planned in a project like this!), we designed with our own hands some nifty “robots” that created art (and even some “music” thanks to the creativity of some of my scientists)! There are many sites that actually provide instructions for how to create versions of artbots, so feel free to test a few models to see what works best for you (and your budget). My Artbots 2.0 are even easier to complete than the original version we did over a year ago thanks to an unexpected change in available supplies. I love when changes actually make things easier for us 🙂
Materials
Electric toothbrushes + some spares (I purchased the GB brand battery-operated brushes sold at Dollar Tree; I found it VERY handy to have a few spares on hand). NOTE: Our previous Artbots were made with the Luminant brand of electric toothbrush. While you can still find Luminants in Dollar Tree stores, the GB brushes are much more common at this time (and actually make for much easier Artbot adaptations)!
Needle-nose pliers
Box cutter (to cut the pool noodles down to size before the program, though scissors work great as well)
Electrical tape + scissors (though masking tape or duct tape work just as well)
Styrofoam pool noodles (I found these at Dollar Tree as well)
Rubber bands of various sizes
Markers or pens (thin or thick – makes no difference!)
AA Batteries (which I also purchased at Dollar Tree on the cheap). NOTE: The Luminant brand brushes actually came with a battery (which sometimes didn’t work, so I had spare batteries for emergencies). The GB brand does NOT come with the necessary AA battery, so you will need to supply them (and it’s still a good idea to have spares on hand for the occasional dud).
Paper to test the Artbots on – I actually had a giant roll of white paper that I used to fully cover the surfaces of our work tables, so my scientists could just test their bots whenever they felt like it without having to worry about finding scrap paper, or keeping their bot confined to a small piece of paper.
Any other supplies you want to use for decorating. I pulled out everything of interest I could find in our craft supply closet: beads, pipe cleaners, pompoms, buttons, google eyes, jingle bells, colored craft sticks, etc.
STEP ONE: Take apart the GB Toothbrush
Here is where the GB brand completely trumps the Luminant brand for ease of modification. The GB brush very simply pulls apart into 4 pieces, as seen in the images below. The motor is already a part of the battery casement with the on/off button, so once you have pulled apart the toothbrush, you simply need to put a single AA battery into the battery casement and test it by pressing the on/off button! My motto is “always be prepared for anything,” and sure enough, about 1/3 of my scientists had toothbrushes that were a little finicky about fully separating. I bopped around the room with my needle nose pliers and helped yank out the battery casement for the scientists experiencing some trouble. And there were a few cases of over-exuberant separating where the scientists actually pulled the motor and a bent metal base out of the battery casement (in most cases we were able to reassemble on the fly) – and a few cases where the motor just didn’t turn on despite testing multiple batteries. And THAT is why I always have extra brushes on hand. When you’re buying electric toothbrushes from a dollar store, you really do have to be prepared for a few duds in the mix.
STEP 1
Possible additional pieces from Step 1
When things go slightly wrong…
Once all of my scientists had separate battery casements with motors attached, and all motors had been tested, it was time for our next big challenge…
STEP TWO: Houston, we have a problem! Fitting the motor and battery casement into the pool noodle pieces…
With the Luminant brand brushes, the cobbled together battery casement and motor fit nice and snuggly inside the hollow center of our pool noodle pieces. I discovered during my own personal testing prior to the program that the battery casement from the GB brushes was a bit thinner and actually slips straight through the hollow center of the pool noodle. I suspected that fixing that would probably be as simple as using some rubber bands or duct tape to fill out the space, but I wanted to involve my scientists in the problem-solving. So I demonstrated our problem to the group and asked them to help me find a solution. Most of the scientists quickly figured out that you could use duct tape or masking tape to prevent the motor from falling out of the bottom of the pool noodle piece. HOWEVER, as many discovered, you also had to make the battery casement/motor SNUG inside the pool noodle. If the battery casement was still loose inside the pool noodle, the motor was unable to properly vibrate the noodle and move it around the table. Some scientists filled the gaps with pipe cleaners; others used rubber bands. Both solutions worked well.
With that problem solved, all that remained was the fun and freedom to design the individual bots!…
FINAL STEP: Decorate!
I provided our scientists with pipe cleaners, google eyes, feathers, fun buttons, etc. (pretty much any fun supplies I could find in our crafting storage). Some artbots can be made using plastic cups and the like, but the beauty of the styrofoam pool noodle pieces is that decorating is a snap! For most supplies, all you need to do is push materials directly into the styrofoam – no glue or tape required. I did provide wet glue for items like pompoms, but most scientists quickly realized that waiting for glue to dry was no fun – it was so much easier to poke materials into the pool noodle. I personally find that pipe cleaners are invaluable – you can weave them through button holes, wrap them around pompoms – and as my super creative scientists discovered, you can even string tiny bells onto them! And the ends of pipe cleaners very easily poke straight into the pool noodles.
In an interesting and unexpected turn of events, my scientists got so inspired by the act of creating their bots that they even took apart about a dozen of my pens on the supply table so they could make use of the springs and plastic pen shells! [I totally didn’t see that one coming 🙂 ]
I actually covered our usual program tables with paper so my scientists didn’t even have to worry about scrap paper (as you can see in the video above). Once the artbots were assembled and decorated, my scientists had free reign of table surfaces to create their art. At some point, of course, the battery will likely wear out and you will need to pull the motor assembly out of the pool noodle to replace the battery. But that’s a simple price to pay for such a fun gadget!
At our first G3 program of the Fall on September 16th, we had a visit by Joy VanderLek of The Cheshire Citizen. She posted a great article about our program online…be sure to check it out! 🙂
Okay. Sometimes, my G3 programs come together in very interesting ways. My idea for this program started with a beautiful banana. As some of you may recall, I’m a big banana fan – they are just so darn interesting! And then it grew from there. There are so many fun science projects and demonstrations you can do with food that I just couldn’t help myself. So for our first G3 program this Fall, I had our G3 scientists take on the following:
We investigated to see if TOTAL brand cereal uses real iron in its cereal flakes. [“Eating Nails for Breakfast”]
For fun, I challenged the scientists to pull a table cloth out from under a full table setting…and explain to me the science behind the results [“Tablecloth Trick”]
I had the scientists work hard for their afternoon snack by making their own butter.
I demonstrated how the magical banana can actually form the base for a very delicious “ice cream” treat.
Finally, I let our scientists combine their love of science with their creative sides by tattooing bananas with fun images and talking about how the heck that’s even possible!
EXPERIMENT #1: “Eating Nails for Breakfast” [from Steve Spangler]
Materials:
TOTAL brand cereal [enough so that each scientist can have a sandwich bag filled about 1/3 of the way up – for my group of 22 or so scientists, I used 1-2 full-sized boxes of cereal. I chose to pre-fill baggies with the cereal]
Water for each scientist [I just distributed a standard water bottle to each scientist, though they only used a small portion of the bottle]
Sandwich bags that zip closed [2 per scientist]
Strong magnets [I actually own a nice neodymium magnet that I picked up from the Steve Spangler store…and that worked best for us as a group. But I have seen the experiment work with bar magnets, and according to its packaging, my cow magnet should also have worked well. If you have enough magnets to distribute around, all the better. I passed my one neodymium magnet around from table to table…]
The trick with this experiment is that it actually takes some time to complete it and get to the results phase. So I started our program hour with Part One of this project, and we returned to it before the scientists had to go home at the end of the program hour.
After explaining to the group that we were going to try and verify that Total cereal adds actual iron to its cereal flakes, I distributed the pre-filled baggies of Total cereal to each scientist and asked them to seal up the bag (getting as much air out of the bag as possible) and smash the cereal into small pieces/crumbs. As you can imagine, my crew had a LOT of fun pounding their cereal into smithereens. After a few minutes, I asked each scientist to pour their cereal crumbs into a second, empty baggie and then fill the bag about 1/3-1/2 up with water. [I discovered during my own early testing that the process of crushing the cereal flakes created some small holes/tears in the original baggie…which of course made for quite a mess when I added water to the bag. My simple solution was to have every scientist start with a fresh bag before we added the water.] Once the water was added, it was time to set this project aside for at least 30 minutes. Truthfully, you might have luck returning sooner than that, but it’s better to be safe than sorry!
When we came back to this experiment at the end of the hour, the next steps were very simple in deed. I asked each scientist to shake their bag of water-logged cereal flakes…which essentially breaks up the flakes even further so you get something that looks rather like a cereal slurry. If any of the scientists seemed to have a little too much air in their bag, I helped them to carefully get some of that extra air out and then reseal the bag. Each scientist then laid their bag of slurry flat on the table surface and everyone took turns pressing the neodymium magnet directly onto their bag. When you do that, the magnet pulls literal iron filings up from the slurry to the surface of the bag. You can even drag them around the top of the bag with the magnet’s help! Our scientists (and their parents!) were amazed to find actual iron in a breakfast cereal!
In the video below, Steve Spangler does a great job of explaining the experiment itself. In the 2015 National Geographic Kids book, Edible Science, there’s also a wonderful description of the same experiment (pg. 18) along with an explanation for why the heck manufacturers put iron in our cereal:
Iron is naturally found in meat and some vegetables. In those foods, the iron exists as one part of a large molecule, such as hemoglobin. However, the easiest way for a food manufacturer to increase the iron content of a product is to add pure, metallic iron. Many cereal makers grind iron into metal dust and mix it into the batter for their flakes… (pg. 18)
I used an actual Tablecloth Trick demonstration pack from Steve Spangler that included the special tablecloth and a full table setting (plastic plate, plastic bowl, plastic cup, fork, knife, and spoon)
Honestly, I did this demonstration because I knew the kids would have fun with this challenge. This was one of my take-homes from my Steve Spangler conference in July 🙂 I simply challenged my scientists to pull the tablecloth out from under the full table setting. I demonstrated first, and then without giving any tips or instructions, I asked the scientists to line up next to the table where I had set up the tablecloth and give it their best shots…with a promise that we would talk about the “science” behind the demonstration after they had all had a turn.
If you go to the first link above, Steve Spangler’s web site does a great job explaining how to best set up the demonstration…and what the science behind the trick actually is. Basically, you need to:
Spread the tablecloth out onto a flat tabletop with about 2 feet of the tablecloth on the table. Make sure there are no wrinkles.
Place the cups, plates and utensils on top of the tablecloth relatively close to the edge of the cloth (increases the chance of success for beginners).
The trick is to grab the ends of the tablecloth with both hands and quickly pull the cloth straight down and away from the table. The key is the quick, downward motion – almost like you’re whipping or yanking the cloth away. Keep saying to yourself, “Pull down… not out.” Make sure to pull perpendicular to the table and not at an inclined angle.
Amazingly, I think all but 1 of my 22 scientists were able to successfully do this trick in the first go! What is the science involved in this trick? Inertia and Friction. According to Sir Isaac Newton’s Law of Motion: 1) an object will remain at rest until a force acts on it, and 2) an object in motion will remain in motion unless a force acts on it. Thus, our full table setting (plates and silverware) will remain in place (at rest) unless a significant force acts on them. Where does the Friction come into play? Well, initially, all of the objects (the plate, bowl, cup, utensils) are at rest (not moving). When you pull the cloth, friction acts on the objects in the direction of the pull for a short time. But the tablecloth (with no hem or edging) is slippery, so these forces are small and the cloth sneaks out from underneath the objects.
EXPERIMENT #2: Snack Time…Let’s Make Butter!
Materials
Heavy whipping cream (room temperature – out of the fridge for 6-8 hours)
Small containers with secure lids (In the past I used recycled 4 oz. baby food jars, one for each scientist. This time I used small mini cups…and they worked SO much better!)
A little salt for flavoring
Bread, for snacking
Plates to put the snack on 🙂
Even having done this before with a different group of scientists, I’m still amazed at how easy this is…and how satisfying. There’s something really nifty about letting my scientists make something that they can instantly use (or consume). I passed out the mini cups, which had about 1/4 to 1/2 inch of heavy cream in the bottom. [This small amount of cream produces plenty of butter for each individual scientist, approximately 1-2 servings.] I instructed my scientists to add a pinch of salt for flavoring if they wanted (most of us eat salted butter at the dinner table). We sealed the cups tight, and then it was just a question of some time and arm muscle. You need to shake the cream in the container for about 10 minutes to instigate the physical change in the cream. Basically, when you agitate the cream for a long enough period of time, you are helping to separate the fat solids from the “butter milk.” [NOTE: Leaving the cream at room temperature for a while helps the physical transformation along at a quicker rate.] Every one of the scientists saw the full physical change and achieved both the full butter solids and the butter milk! And everyone loved the flavor of their butter on the bread I passed out to all 🙂
DEMONSTRATION #2: Banana “Ice Cream”
While my scientists munched away on their bread and butter, this seemed like the perfect time to give them a little something sweet to sample at the end of our snacking. I recently discovered – while browsing through my Nam Nam Paleo cookbook, that you can make the most amazing fake ice cream using frozen bananas as your base.
Ingredients
3 bananas (halved, placed in freezer bags, and frozen overnight)
1 cup of frozen strawberries (you could probably use any frozen fruit here)
1/2 cup of coconut cream (you can find that in most food stores in the aisle where they sell the fixings for adult cocktails)
1 tsp. vanilla extract
A nice food processor
I carted my food processor in from home, and then proceeded to demonstrate to my scientists how to put together this recipe. After just a few minutes in the food processor, the ingredients really do have the texture and temperature of a nice soft-serve ice cream without using any milk or cream! The hero in this recipe is the banana. Bananas have high levels of pectins (a type of water-soluble fiber). To be frank, I don’t even understand the full “how does it really work” with this recipe. But there’s something that happens when you freeze the bananas and break up that fiber in the food processor that makes for fake ice cream magic (yum!). I had the scientists line up, and I gave them all a sample in a mini cup (like the ones we used to make butter). All of my scientists loved this recipe so much they came back for seconds…and all of the moms present seemed very interested in jotting down the recipe 🙂
ART/SCIENCE PROJECT: Tattooing Bananas
Materials:
1 banana per scientist
Fun images for the scientists to use as templates
Scotch tape
Push pins or toothpicks (I found that push pins worked easiest, but I know some folks would prefer toothpicks if they plan on eating the bananas later)
This banana project was literally the starting point for this entire ‘fun with food’ program. I was DYING to try this out with some of my regulars at the library. So easy, and such a quick reward for your efforts. This one did take a little pre-work on my end, though. I selected some fun images that I thought the scientists would have fun working with: Beeker, a Minion, Olaf, a Lego Ninjago, the Batman symbol, etc. I then measured my typical banana and created a rough outline in a blank PowerPoint document (about 2 inches by 7 inches) and then sized the images to be approximately that size. [I wanted to ensure that the images I passed out to the scientists would roughly fit along one side of their bananas, and wouldn’t be too large or too small.]
After distributing the bananas, I instructed the scientists to cut out the image of their choice. No need for precision here – you want there to be a wide border around the image itself. I then had them tape the image in place on their banana. And then it’s just a question of a little time and patience. You use the push pin to punch holes around the ouline/lines of the image (like tracing the image with a series of dots). When you think you’ve put holes in all of the major lines, you can remove the paper and then just fill in some of the lines with more dots to make for more solid lines (think of it like connecting-the-dots).
Minion Banana
LEGO Ninjago Banana
Almost instantly, the dots create a brown discoloration on the surface of the banana. This happens because of oxidation. Bananas contain polyphenol oxidase and other iron-containing chemicals which react with the oxygen in the air when the cells are cut open (similar to what happens when rust forms on a piece of metal). We had some pretty terrific art come out of this science demonstration/project, and as a bonus, the scientists could take the bananas home and eat them later! The push pins actually don’t push very far beyond the skin of the banana, so 1) the bananas stay fresh for a while, and 2) the artwork on the skin remains just as lovely a day two after you complete it.
CONCLUSION
As you can see, we had a lot on our ‘plates’ for this first program (ha ha), but it was tons of fun for all! Who doesn’t love playing with their food, right?… 🙂
As many of you know, I had the great privilege of being sent to the “Science in the Rockies” conference created by the Steve Spangler Institute. I spent 3 days doing nothing but super fun science experiments led by our favorite science man himself, Steve Spangler! I can’t wait to share some really fun activities and experiments with all of you when G3 returns in September.
Me and Steve Spangler
Getting ready for the potato gun battle
The video below is just a taste of some of the fun I had (try not to be jealous!). It’s a contraption built from a leaf blower that shoots massive amounts of ping pong balls REALLY far thanks to the concentrated air pressure. I’d show more images from the conference, but I don’t want to spoil any of the science surprises 🙂
As my loyal followers may have noticed, I LOVE playing with polymers! There are so many ways to have fun with them. And since this program was going to be the last program before we go on summer hiatus and resume in September, I wanted to let my scientists go wild (and get nice and messy) with some fabulous polymer projects 🙂
I started our program by chatting with my scientists about polymers… Polymers can be found just about everywhere – in places you might not even have realized. They are in natural products like wool and silk (among many others), and then also in many man-made synthetic materials like nylon and rubber. Even the double-helix strand of DNA is a form of a polymer known as a “biopolymer.” But what exactly is a polymer?
The word polymer means “many parts.” The individual parts that actually combine to form a polymer chain are called monomers. Sometimes a substance can actually help polymer chains link together and form a more solid substance. The youtube video by TTScienceClub below (I love this video!) does a great job of graphically showing the basic formation of polymers and linked polymer chains:
We also discussed how polymers can be both “good” and “bad.” Polymer products (like water bottles) can be cheap, durable, and convenient. But sometimes polymers can do some harm (taking over landfills because they aren’t biodegradable, being accidentally ingested by animals, etc.). I reminded my scientists it’s always good to investigate and know all sides to a story and to keep an open mind when learning about anything.
EXPERIMENT #1: POLYMER ORBS
Steve Spangler Orbs
[NOTE: I really think of this as a take-home experiment.]
Steve Spangler sells a wonderful product called “Orbs” (colorful growing orb spheres). They arrive as a tiny sack of itty-bitty polymer beads…but soaking them in water allows the magic to happen! When you soak them in water for 5-6 hours, each bead absorbs about 300 times its weight in water, allowing the beads to become the size of a large marble (a large, squishy marble, that is) 🙂
I gave each scientist a cup with 5 different-colored beads in it, and also a mini-cup with 5 like-colored orbs fully grown (which I prepped the day before; there’s no danger to letting the orbs sit in excess water for any period of time). The kids could see just how much water the polymer orbs took in and how large they grew. I asked them to add water to the tiny, unsaturated beads so they could watch their rate of absorption over the course of our 1-hour program. We also had some fun with the fully-grown clear orb in particular. Because of its concave shape, if you roll the clear orb over any tiny printed materials (for example), it will act as a magnifying glass!
DID YOU KNOW…
Superabsorbent polymers are used in countries all over the world to preserve water in the soil, especially during drought conditions. The polymer holds the water until the plants or crops need it, then releases the water to the roots of the plants! [Source: Steve Spangler Orbs Activity Guide]
Each scientist snapped a lid on both cups and was able to take them home to watch them grow to full size. The beauty of these orbs is that – like with other polymer beads – if you let them dehydrate, they will return to their original size! Thus, my G3 scientists can continue to enjoy playing with these polymers time and again at home. We did have some scientists that smashed or broke apart a full-sized orb (after it absorbs water, the orb is softer and gelatinous). I told those scientists to save the pieces, dehydrate them, and see just how tiny those pieces would become!…
EXPERIMENT #2: FLUBBER
Flubber Recipe:
[NOTE: You will find many recipes online – this one from LittleBinsForLittleHands worked great, though I did adjust the recipe into smaller measurements to make my materials go farther while still giving the scientists plenty of flubber to play with :)]
1/4 cup Elmers glue (I used multipurpose white, but I have successfully used clear in the past)
1/8 cup water (room temperature)
1/8 cup liquid starch (I have used both Sta-Flo and Linit brands with success – this time we used Linit which I purchased at ShopRite)
Food coloring (optional); WARNING: food coloring will stain clothing/carpets, so if this is a concern, try something fun like glitter or sequins as an add-in for the flubber!
Additional Supplies:
Bowls for mixing ingredients in (I used paper bowls with a coating; you can also use plastic bowls if available)
Plastic spoons
Small plastic cups for pre-measured ingredients (I generally prefer to pre-measure ingredients for my scientists to help the flow of the program so that we have more time for enjoying the product of our experiment)
Plastic sandwich bags to take the slime home in
Plastic drinking straws…for playing with the flubber! (see content below)
Every young scientist loves a good slime recipe. For our program, I decided we’d try a borax-free slime recipe for “flubber” (borrowed from littlebinsforlittlehands.com). What’s the difference between slime and flubber, you may ask? Well, slime is a lot “looser” – flubber is a little firmer and more dough-like when it’s mixed. There was a good reason why I chose flubber instead of slime for our main goo recipe…but more on that below 🙂
There’s definitely an order to how you combine the ingredients for any slime recipe. [I pre-measured all of the ingredients so our scientists could focus on the process and exploring the results.]
STEP 1. Pour the glue into a mixing bowl.
STEP 2. Add the water. Stir until combined. You should get a smooth, milky white liquid.
STEP 3. If you want to color your flubber/slime, this is when you add it 🙂
FINAL STEP. Pour in the liquid starch. You can start by stirring with a spoon, but pretty quickly you’ll realize that the best way to mix is by using your hands. You need to get in there and do a lot of good squeezing and smooshing, to make sure that all of that liquid starch comes in contact with as much of the glue as possible. In our recipe, the glue contains our polymers, and the starch is what will link all of those polymers together to form our gooey substance.
Some of our scientists LOVED this phase, and others couldn’t stop talking about how gross it was (haha). [REMINDER: Food coloring will stain, so if your goo will be traveling around the room, it’s best if you wear protective smocks or protect your floor/table surfaces.] You may find there’s some liquid starch left over in the bottom of the bowl – that’s okay! It just means that all of your glue polymers have already been linked by liquid starch and the rest of the starch is just excess and unnecessary.
TIP: If you plan on saving your flubber to play with on another day, you may find that the texture changes a bit. Simply add a little more liquid starch, squeeze and smoosh, and then when the flubber stops absorbing starch you know your flubber is as good as new!
The reason I chose flubber for our goo experiment was that you can actually blow reusable bubbles with flubber! It takes a little practice, but with the right technique, you can blow a REALLY large bubble, pop it, and start all over again using just a simple drinking straw! We had some scientists who used the table surface to support the giant bubbles they were blowing (very creative!).
[NOTE: the amounts in parentheses were from the original recipe – I scaled back to ensure that I had enough supplies for every scientist to take home some of this super fun slime!]
4 teaspoons white school glue (1/4 cup)
1 teaspoon water (1 tablespoon)
1 teaspoon thermochromic pigment (3 teaspoons) (This specialty ingredient definitely pinched my budget, but I think it was well worth it. It creates a really terrific effect. I bought two 10-gram bags of the blue pigment from Amazon and was able to stretch it into 22 portions with my modified version of this recipe. Be warned! – the blue pigment is a dye and WILL stain clothing, so be careful when handling…)
4 teaspoons liquid starch (1/4 cup)
Food coloring optional
Additional Supplies:
Bowls for mixing ingredients in (I used paper bowls with a coating; you can also use plastic bowls if available)
Plastic spoons
Small plastic cups for pre-measured ingredients (I generally prefer to pre-measure ingredients for my scientists to help the flow of the program so that we have more time for enjoying the product of our experiment)
Plastic sandwich bags to take the slime home in
Materials that can be either very hot or very cold (see my notes below)
As you can see, the above recipe is very similar to our flubber recipe, but with one striking difference – the addition of “thermochromic pigment.” The pigment reacts to changes in temperature, most noticeably heat. Even when the pigment is just in its bag, you can touch the blue pigment, and it will turn white with the heat from your fingers. When I made my test batch of slime, I took my cues from the Left-Brain-Craft-Brain blog post (linked above to the experiment title) and used yellow food coloring during the creation of my slime. Thus, my final slime (in a resting state) was a turquoise blue, but when hot, turned a nice yellow. Also, if exposed to extreme cold (like a gel pack from the freezer), it turned a very deep blue.
I let each scientist determine which food coloring they wanted to use (or even to use none at all if they were fine with it just turning white when hot). The basic slime-creating steps are the same as the ones we used for the flubber above:
Mix the glue and water together in a bowl.
Add the food color of your choice.
NEW STEP! This is when you (carefully) mix in the pigment. It will take a while to combine, so you need to be careful when stirring or you’ll have pigment powder flying out of the bowl. But slow and steady wins the race with this one! You should have a smooth blue liquid when all the powder is combined.
Add the liquid starch and stir. At some point, you will need to get in there with your hands and squeeze until all of the glue has combined with as much of the liquid starch as it needs.
Be aware that the pigment will temporarily stain most hands a faint blue, but that will disappear with washings in a day or so (just like food coloring does). If you don’t want to worry about staining, you can just use some disposable vinyl gloves to keep hands nice and clean 🙂
The trickiest part of this experiment was figuring out how to allow the scientists to heat the slime enough to see a dramatic color change. I tried hair dryers and heating pads with no good results, but I did figure out a safe way to pass around hot water while limiting the chance that a scientist could get burned. I used the mini cups from the Orb experiment (which come with snap-on lids), filled them half-way with hot water from my electric kettle, snapped on those lids, and then allowed the scientists to press the bottom of the cup to the top of their slime. It worked great! We ran out of time, so I was unable to pass around all of the gel packs I had borrowed from staff members for the cold reaction, but I encouraged the scientists to continue playing with the slime once they got home.
This program was a terrific way for us to start off the summer here in Cheshire! Be sure to check out the fun video I made with some photos/clips from our program below.
One final note about CLEAN-UP for any goo/slime experiment:
It is NEVER a good idea to allow slime/goo to go down sink drains. It should always be thrown in the trash when you’re ready to get rid of it. If you have lab coats covered in slime – like I did – I would not recommend using a personal washing machine to clean the coats. Usually I clean coats at my leisure with my home machine, but a program like this is the one time I splurge and pay for professionals to handle it. My local cleaners actually were able to remove not only the slime, but also most of the color! It just takes a lot of effort with extremely hot water, and many, many, many soaks in a vat of hard-core bleach. You might be up for the challenge, but I’ll let the professionals handle this one 🙂
See you in September when we’re back with more great programming fun!…
Just a quick fun post I wanted to share in-between G3 programs. My Aunt shared this cool web site with me. Since 1989, peregrine falcons have been nesting on the high-rise Monarch Place building in Springfield, MA. Over the years, they have produced over 30 offspring from that location. A permanent nesting ledge – with live camera – was attached to the building to help them out and keep them safe. You can view them during any daylight hours by going here:
I’ll warn you now, watching the live web cam can be addictive (though I often seem to catch the chicks when they’re sleeping in a giant, fluffy huddle 🙂 ).
Here are some interesting facts taken verbatim from the WFSB website:
Mating season for Falcons occurs in March. The female lays three or four eggs over a period of approximately seven days. Hatching begins in early May and flight begins at approximately 42 days for male falcons and 45 days for female falcons.
Peregrines mate for life and will often return to the same nest, year after year. They make their nest in a scrape, normally on a cliff edge. The female chooses a nest site, where she creates a shallow hollow in the loose soil, sand, gravel, or dead vegetation in which to lay eggs. No nest materials are added.
The Peregrine is known as the fastest member of the animal kingdom, reaching over 200 mph during its characteristic hunting high speed dive called a “stoop.”
The Peregrine Falcon is also known as a Duck Hawk in North America and is a bird of prey in the family Falconidae.
While its diet consists almost exclusively of medium-sized birds, the Peregrine will occasionally hunt small mammals, small reptiles, or even insects.
After hatching, the chicks are called “eyases.” Both male and female parents leave the nest and travel up to 15 miles to gather prey to feed the young. Chicks fledge 42 to 46 days after hatching, and remain dependent on their parents for up to two months.
The Peregrine Falcon can be found nearly everywhere on Earth, except extreme polar regions, very high mountains, and most tropical rain forests. This makes it the world’s most widespread bird of prey.
This month our G3 crew had a lot of fun with some really simple flying machines…and a large Darth Vader target 🙂
The topic for the day was “flight,” and as we learned in my opening presentation, some of the earliest man-made flying objects were kites found in China as early as 400 BC! Four hundred years before the very first helicopter soared into the sky, famous Renaissance man Leonardo Da Vinci was drawing sketches that would later inspire the invention of the helicopter. In the 1780’s, Europeans could be seen floating through the air in hot air balloons. What does this all mean? It means that for much of human history, men and women have been fascinated with flight and continually strive to send objects (and themselves) into the air.
Many of us are very familiar with the work of the Wright brothers in leading advances in mechanical flight (i.e., motorized airplanes). However, it is an Englishman named Sir George Cayley who earned the title of “The Father of Aviation.” Around 1800, Cayley not only detailed the necessary forces at work for objects to fly…but he also created the first glider capable of carrying a human being through the air. And that first air-born human was actually a 10-year old boy!
LIFT. Air moves over the top of a wing, and needs to travel faster than the air moving under the wing. Faster air = lower air pressure. The high pressure UNDER the wing lifts the wing up toward lower pressure.
THRUST. Makes a plane fly forward. For our G3 projects, thrust was created by rubber bands or our own arm muscles.
DRAG. Thrust and drag work against each other. Thrust pushes a plane forward until the resistance from drag pushes hard enough to make flight stop. [For designing our paper airplanes, small pointed fronts/tips make for less drag.]
WEIGHT. Lift aims to keep objects up in the air; weight drags them down. The heavier the material, the more lift needed to help it fly.
Before we dove into the project work for the day, I felt it would be inspirational to see the following video depicting the world-record paper airplane throw back in February 2012. The paper airplane had no special enhancements; it was simply made from well-designed and folded paper…though as you’ll see in the video, the trick to the long throw was the throwing arm of a professional football player 🙂
The man who designed the airplane seen above is John Collins, also known as “The Paper Airplane Guy.” Collins has made a full-time career out of doing nothing more than designing paper airplanes! In particular, he is famous for using nothing but paper and origami-like paper folding skills in his designs. Collins shares some simple paper airplane designs on his web site. In the video below, Collins is interviewed by Jamie & Adam so that Collins can share some great information about his paper folding techniques, different design styles, etc.
So, with John Collins and his fabulous designs as one source of inspiration, we then turned toward some great designs from some books in the Cheshire Public Library collection. My two favorite sources were:
Bobby Mercer’s book, The Flying Machine Book: Build and Launch 35 Rockets, Gliders, Helicopters, Boomerangs, and More. [The photos aren’t the best, but the instructions or pretty straight-forward.]
The Kid’s Guide to Paper Airplanes by Christopher L. Harbo. [The illustrations were really handy and there were some very fun variations.]
I displayed and demonstrated a variety of different paper aircraft for the G3 scientists to observe, and then I let them grab instructions for the aircraft that impressed them the most. I walked around the “folding station,” helping our scientists with one-on-one help as needed. [In the future, I’ll either try to get more assistants in the room with me to help with the folding and instruction, or I’ll focus on one specific aircraft with all and then let the scientists branch out to other folding when ready.] All scientists present had the opportunity to experiment with:
Classic Dart (Harbo)
Sonic Dart (Harbo)
Hammerhead (my personal favorite!) (Harbo)
Angry Finch (Harbo)
Basic Straw Rocket (Mercer)
Red Baron (Mercer)
Criss-Cross Flyer (Mercer)
Classic Dart
Sonic Dart
Hammerhead
Angry Finch
Basic Straw Rocket
Red Baron
Criss-Cross Flyer
My personal favorite is the Hammerhead – a paper aircraft designed for abuse that glides beautifully (no pointing front end to get mangled after each crash landing!). After my description, that’s the aircraft a lot of the scientists started with. There were also a lot of Classic Darts and Sonic Darts floating through the air. During my earlier demonstration, the Angry Finch was a group favorite – for it’s unpredictable flight patterns – but it does require more advanced folding skills. There was even one G3 scientist that developed some mad skills with the Criss-Cross Flyer (which is designed to perform like a boomerang, to circle and return to the person launching it). The Criss-Cross Flyer takes some practice to use, but once you get the hang of it, it’s an addictive little aircraft:
We also had several scientists that created their own modified versions of paper aircrafts! [My favorite part of any program is when my scientists feel brave about testing their own designs/theories :)]
This slideshow requires JavaScript.
INSPIRATION FROM THE CONNECTICUT SCIENCE CENTER
Copter template from Connecticut Science Center
For some added fun, I set up a station inspired by an activity I discovered at the Connecticut Science Center in Hartford, CT. For any of you that haven’t had a chance to visit the Science Center yet, be sure to pop in and check out “Forces in Motion” on Level 4. There are a lot of cool hands-on activities, but my favorite was the paper “copter” station. The Center set up large square fans/vents with air pushing straight up. With some simple folding, and a tiny cardboard square for some added weight, you can endlessly launch twirling copters into the air, modifying your designs for the best flights.
Using the Center as my inspiration – and borrowing the copter template I took home from the Center – I set up a similar station in our program room. I only had a small box fan – a larger one would have created better flights – but the overall result was still the same!
At day’s end, all scientists went home with instructions for making the flying craft we used in the program. Sadly, Darth Vader could not be saved (hahaha)…but that’s all part of the fun.
For a while now, I’ve been trying to find a clever way to do a CSI program without the need for a high-powered microscope or even higher-powered magnifying glasses (I have a set of simple, plastic ones). Thanks to a wonderful book by Pam Walker and Elaine Wood entitled, “Crime Scene Investigations: Real-Life Science Activities for the Elementary Grades,” I was finally able to put together some activities for my G3 scientists! And better still, the supplies were very easy to gather and not very expensive. I’m hoping to stage a full crime scene event this summer, but for now, my scientists need to focus on the fundamentals and learn some of the skills employed by crime scene investigators…
Before we began our activities, I asked the group some simple open-ended questions. We discussed what kind of evidence might be found at a crime scene, and some of the techniques we thought might be used to find clues and identify suspects.
“A Spooky Crook” – It’s all about the bones…
Materials for each group:
An enlarged photo copy of Figure 22 (The major bones of the human skeleton) on pg. 148 – I put my copies on 11×17 cardstock
An enlarged photo copy of Worksheet 2 for Investigation 3-4 (a partial skeleton) on pg. 153 – I put my copies on 11×17 cardstock
An enlarged Worksheet 1 for Investigation 3-4 on pg. 152 (separate bones from a human skeleton) onto an 11×17 piece of cardstock, and then I cut out the bones and placed them in baggies for each team.
Scotch tape for each group
This first activity was for all of those puzzle-lovers in the group. I read everyone the crime scenario as presented in the book (pg. 151). The basic scenario was this:
With Halloween around the corner, there have been a series of thefts in neighboring middle schools – pieces of skeletons from the science labs in each school have been stolen. The police have arrested someone who had a box full of random bones, and our teams have to sort through the bones they are given, reattach what they can to our school’s partial skeleton, and then identify which bones don’t belong to us and need to be sent on to other schools.
I allowed my scientists to work in groups of up to 5 people. They each had a full diagram of a skeleton from the book, a large sheet with our partial skeleton, and a baggie of bones. Their task was to place as many bones as possible on the skeleton with their tape, and also identify which bones were “extra” and needed to be sent elsewhere. The groups did a great job assembling their skeletons in the time allowed, and most were able to identify at least some of our extra pieces. As a group, we determined that the trickiest bones to place where the arm and leg bones, as some of them were very similar in shape (we had some arm bones placed as leg bones, and vice versa).
“Leery of Labels” – Low fat, or not low fat…that is the question…
Materials:
Brown lunch bags (one per scientist)
Scissors
Pens (for labeling samples)
Q-tips (at least three per scientist)
Small cups or containers (I did three per table so the groups actually shared samples)
Vegetable oil
Samples of butters/spreads with different fat content (I used two: Land O’Lakes Light Butter with Canola Oil, and Land O’Lakes Butter with Olive Oil). You want to have samples with a large enough gap in fat content. My two chosen samples had 5 grams fat and 10 grams fat, respectively…
This experiment (pgs. 176-182) was a little tricky, but after modifying the book activity, I found a way to make it work. First, the scientists and I talked about the Food & Drug Administration (FDA) – what they do, what they monitor, etc. And we also talked a little about why the FDA is important. For example, a lot of diseases and health issues can be linked to higher fat diets, so a lot of consumers rely on accurate labeling to select lower-fat, safer products in the food store. Furthermore, we talked about what a “control” is in an experiment and the importance of having one for comparison to other results. Then, just like in the previous activity, I presented the scientists with a scenario (as modified by me from the one actually used in the book):
We are scientists working on a special investigative team with the FDA. A consumer has written to the FDA, concerned about a couple of products on the market: Trim & Terrific Margarine (our Land O’Lakes Light Butter with Canola Oil), and Fat-Buster Margarine (our Land O’Lakes Butter with Olive Oil). Both are claiming they have the lowest fat content on the market. The consumer thinks one of them must be lying and deceiving consumers with false labeling. Our job is to figure out who the liar is…
Each table received three small containers. One contained a sample of vegetable oil (our control); one contained a sample of “Trim & Terrific”; and one contained a sample of “Fat Buster.” I asked each scientist to cut 3 small squares of paper from their brown paper lunch bags. Size did not have to be exact; I did, however, encourage them to make sure the paper was one layer thick and didn’t included a fold. We first took a look at our control, the vegetable oil. Each scientist dipped a Q-tip in the oil, and then rubbed the Q-tip on a square of brown paper. [There is no need to go end-to-end on the paper; you just want a good sample of the product rubbed on the paper.] Our group consensus was that the vegetable oil (which we know is high in fat) made the brown paper translucent (see-through). It was easiest to see this result by holding the paper square up to the light and moving our hand behind the paper.
Next step was to test each of the butter samples in a similar way. We made sure we labeled our brown squares as #2 (for Trim & Terrific) and #3 (for Fat Buster) so there would be no confusion about our results. The scientists then dipped separate Q-tips in each of the butter samples, and rubbed the samples in turn on the appropriate brown bag squares. I personally found that the easiest way to notice the difference in results was to then flip the brown bag squares upside down on the table surface. Some of our scientists smeared a bit too much butter on the brown bag swatches, which made the ultimate results less accurate. However, most scientists accurately agreed the “Fat Buster” sample (at 10 grams of fat) was more translucent and thus was our liar with the false labeling.
“Learning from Lipstick” – What’s in a pucker?
Materials:
Photo copies of Figure 20 (Some common lip patterns) for all groups (pg. 132)
Photo copies of Data Table (Sketches of lip prints examined) for all groups (pg. 136)
Photo copies of 5 suspect lip prints. Four fellow librarians and I puckered up, put on some bright lipstick, and kissed a piece of white paper. I then created enlarged color photo copies (enlarged by 200%) and made copies for each group. I also selected one of the 5 lip prints and copied it in black and white, labeling it as the lip print from our crime scene.
Magnifying glasses a plus, though not necessary
Pens (for recording findings)
I found this activity fascinating, as did some of the other scientists in the room. Lots of people know that a person’s fingerprints are unique, but few knew just how unique a person’s lip prints can be. According to our book, there are at least 5 common patterns in lip prints (e.g., branching grooves, long vertical grooves, diamond grooves), and most people have at least two patterns in their lips. I kept our crime scenario very simple for this activity:
At a recent crime scene a napkin was discovered with a pair of lip prints on it. The police asked all five women who were present at the event to leave them with a sample of their lip prints. Our job was to analyze the five lip prints in color and compare it to the the black and white copy of the lip print left at the crime scene to see if we could identify the true suspect.
Notice the branching grooves in this pair of lips…
My lips! Notice the long and short vertical grooves…
Now, it wasn’t very difficult for the scientists to match one of the five color lip prints to the black and white crime scene copy of the lip print. While each of the five sample lip prints were from similar shades of lip stick, the actual shape of each person’s lips was significantly different. However, I asked the scientists to look for patterns in the lips nonetheless and to describe their overall findings. [And for added fun, I had them 1) guess which of the lip prints was mine; and 2) see if they could figure out which librarians in the building created the other lip prints as they walk around on their own in the future 🙂 ] We discovered that the most common pattern in the lip prints was “long vertical grooves,” and several combined long vertical grooves with “branching grooves” or even “diamond grooves.”
Fingerprinting
Materials:
Brushes for each scientist (the softer the bristles, the better)
Clear tape (not transparent – the clearer, the better)
White paper sheets for each scientist (if you use corn starch, you will need dark paper to transfer prints to)
Cocoa powder (you can also use corn starch or ink pads – I think in the future, I’ll just go ahead and use ink pads since the cocoa turned out to be so darn messy anyway)
A surface to fingerprint (I had some 8×10 plates of glass from picture frames I bought for the library, so I just took those and wrapped the edges in duct tape to make sure they weren’t sharp. But you can use things like drinking glasses, test tubes, or even test a variety of surfaces!)
Photo copies of Figure 1 (Three basic types of fingerprints) on pg. 4 for each group
Photo copies of Data Table (Fingerprints of people in this lab group) on pg. 8 for each group (I actually recreated the table and modified it a tad based on how I did this activity
Now, there are a lot of versions of fingerprinting activities on line. While I used some reference material from the book above, I chose to go with a variation of the fingerprinting activity that uses cocoa powder to make the prints visible. My thinking was that this would be a less messy method than using ink pads. [Wrong!] I think if/when I repeat this fingerprinting activity, I will definitely just use ink pads. It will be ultimately less messy AND the prints themselves will be more visible. I’ll explain how the G3 scientists and I approached this activity…and where I think we had some pitfalls. But that’s the beauty of experimentation, right? You don’t always get the results you want/expect, but you learn and make better plans for future attempts.
I made sure that each group had the materials I noted above. Fingerprints are most visible on a surface if the print ridges themselves have some oil on them. So I suggested that my scientists rub the side of their noses, or their scalps, before pressing finger tips onto the class sheets I passed out. The scientists were instructed to sprinkle cocoa powder onto the print area and gently dust away the excess powder with their brushes. [Pitfall #1: The brushes I bought were cheap and the bristles were a little too stiff. Brushing the prints actually smeared any evidence of fingerprints.] When the brushes weren’t working well, I suggested that the scientists gently blow the excess cocoa away from the prints. As you can imagine, there were a few clouds of cocoa drifting around the room…(but at least it smelled really good!).
Interesting fact: Dogs’ noseprints can be used to identify dogs just like fingerprints can be used to identify humans. Each dog’s nose print is unique!
When a print was exposed, the scientists were instructed to use clear (not transparent) tape and lay it directly on top of the print. The tape is then pulled up and placed sticky-side down on a piece of white paper. [If you use corn starch, you would lay the tape with print onto a piece of DARK paper so the white would stand out.] I had placed magnifying glasses at each table so the scientists could evaluate their prints better. [Pitfall #2: The cocoa powder did not accentuate the prints enough, and combined with my low-end magnifying glasses, it was very difficult for the scientists to evaluate their own prints.] A few scientists had prints they could look at, and most of them were actually pleased simply with the fact that they were able to transfer a print from the glass to the paper for evaluation (despite the fact that they couldn’t see any of the patterns clearly). Still, in the future I will definitely use ink pads since the prints will be much clearer and easier for the scientists to evaluate.
All in all, a pretty successful first attempt at a CSI program 🙂
I’m always looking for something new to do with my G3 scientists, and I’ve been itching to try out some sort of density-themed program for a while now. I finally decided to just go for it, and I’m so glad I did. My crew LOVED both the density tower demonstration as well as the take-home lava lamps. We also tried a third experiment called “Light Ice, Heavy Water” – but more on that one below.
A material’s density is defined as its mass per unit volume. It is, essentially, a measuremement of how tightly matter is crammed together.
And who discovered the principle of density? Our beloved Greek scientist, Archimedes, who is famous for the story of how he discovered the principles of both density and buoyancy…in his bathtub, then running through the streets naked screaming “Eureka!” at the top of his lungs 🙂
The inspiration for this demonstration came from our dear friend Steve Spangler. The density tower does require some pricier grocery items if you really want to impress the room with as many layers as possible, but all of the items are pretty common. So if you don’t have the budget for the supplies, I suspect you can convince some friends, family, and/or co-workers to donate some supplies (like I did!).
Materials:
Tall, narrow, clear container (500 mL or 1000 mL graduated cylinders are perfect); I actually ordered this set of cylinders from the Steve Spangler store – an investment I know I’ll make use of in the future, and overall not that big of an expense
Turkey baster (pretty crucial in creating your density tower)
100 mL (1.5-3.5 oz) lamp oil (this was the trickiest item to find – I ended up purchasing red lamp oil on Amazon.com)
100 mL rubbing alcohol (I used 70%)
100 mL vegetable oil
100 mL tap water
100 mL dish soap (I used Dawn dish soap because I had some left over from previous experiments)
100 mL whole milk
100 mL 100% pure maple syrup
100 mL corn syrup (I used light corn syrup, and it worked just fine)
100 mL honey
Ping pong ball (I borrowed one from a co-worker)
Soda bottle cap
Plastic beads (I grabbed a handful from our craft supplies at the library)
Grape tomato (I actually used a cherry tomato, which could explain why it landed at a different level than the experiment noted, but nothing wrong with that!)
Board game die
Popcorn kernels (Again, I put a call out to my co-workers and someone nicely brought me in a small handful)
Metal nut or bolt
First, I had considered actually creating the tower in the presence of the scientists, but after watching this density tower video from Steve Spangler on youtube and seeing just how patient and careful you need to be while creating it, I decided to go another route. I actually created my full density tower the night before my program – it took about 1-1.5 hours because I really took my time with it. I used the largest of the cylinders that came with my Spangler cylinder set, and I added 100 mL of each substance. I pretty much followed Steve Spangler’s advice in the video I noted above. You can add the first couple of items just by SLOWLY pouring a small stream of the liquid into the cylinder. But then you need to start using the turkey baster to slowly add additional liquids. As Steve notes in his video, keep in mind that several of the liquids are so close in density that it is VERY easy for the liquids to actually mix. If you rush and your items mix, you can let them set for 24 hours or so, but there’s no guarantee that they will cleanly separate (at least not as much as they would have with a more careful hand used in creating the original tower).
It’s been a while since I did a classroom-style G3 program, and it worked out perfectly with the density tower demonstration. I had scientists at 5 tables, with my table up front. I disguised the density tower by putting it under a wast basket on the table, and lined up all of the items I used to create the tower along the front of my table (in no particular order). After briefly defining density, I put simple worksheets out and asked the groups at each table to see if they could guess which of the items on my table were the most and least dense. In fact, I asked them to rate the items from 1-9, with 1 being the most dense and 9 the least dense. I encouraged them to come to the front of the room and shake the bottles/containers so they could get a sense of the different viscosities (thicknesses), etc. The scientists spent a good 20 min. running back and forth, comparing notes on the various liquids. There was a lot of great deductive reasoning going into the group thought processes. For example, one scientist would say, “The Corn Syrup and the Honey both move really slow and seem much thicker than the other liquids, so they must be more dense than the others.” Or another scientist would say, “Alcohol seems to evaporate quickly when I put it on a cut, so it might be less dense than some of the other liquids.”
I then had a lot of fun revealing the true order of the liquids with the scientists, starting with the honey as the most dense, and ending with the lamp oil as the least dense. But I stressed that a lot of the liquids are actually extremely close in terms of density. For example, compare the density of some of the items used in our density column:
Rubbing Alcohol .79
Lamp Oil .80
Vegetable Oil .93
Water 1.00
Milk 1.03
Dawn Dish Soap 1.06
Light Corn Syrup 1.33
Maple Syrup 1.37
Honey 1.42
You can see from the above list that there is a greater danger of water mixing with milk than of water mixing with honey, or with vegetable oil mixing with maple syrup.
Once our full list had been revealed, I unveiled my own density tower and encouraged the scientists to come to the front of the room for the next level of experimentation: adding objects to the tower to test their density compared to our liquids. This was probably the most fun I had all day. The G3 scientists had a blast trying to predict where our different objects would land in the density column, from the bolt to the ping pong ball and everything in-between. As you can see from the videos below, the scientists were fully engaged and invested in discovering the results of our experiment. Not all of our objects landed at the same levels as noted in Steve Spangler’s own experiment, but I simply explained to the group that our objects may be of different sizes and densities than the ones that he used.
THE LAVA LAMP EXPERIMENT
Materials:
Bottles for each scientist (I tried using recycled water bottles, but visually the lava lamps were so much better in a glass bottle. I lucked into a sale at Michael’s for some glass milk bottles with some screw caps)
Water or Vinegar (I just used tap water to fill each bottle to the half-way point; I have read that the reaction is more dramatic with Vinegar than water, but I left that for each scientist to test at home)
Vegetable Oil
Liquid food coloring
Alka-Seltzer tablets, at least one per scientist
Paper towels for spills and oily hands
There are a lot of different versions of this experiment online, so I just used the combination of what worked best for my materials. A lot of instructions have you add the oil first, but I wanted the scientists to mix the water color first. So, I passed out the glass milk bottles to each scientist, pre-filled to about the half-way point with water (no need to be super exact). I then had them choose the color of their choice and use the food coloring to color the water. They then added enough vegetable oil to top off the bottle (with a small air pocket at the top of the bottle). We gave the bottles a chance to settle into their two layers – with the colored water on the bottom and the oil on top. I then gave everyone an Alka-Seltzer tablet. We dropped them into the bottles, quickly resealing with the cap. The Alka-Seltzer reacts with the water, forcing colored bubbles of the water up through the oil…so you get about the same affect as a real lava lamp! Once the Alka-Seltzer fully dissolves in the water, you can add another one and start the process all over again. I also find the lava lamp bottle very soothing and fun to play with in its quiet state (without the bubbling) 🙂 My scientists were very excited to take this one home with them. We did have some accidents with the vegetable oil being poured to over-flowing, so be sure to have some paper towels on hand to help with any mess. And we actually had a few of the caps pop off the top of bottles during the bubbling phase – no doubt due to overfilling – but the reaction in the bottle was not so eruptive that we had a messy explosion (we just put the caps back on).
All science experimentation has some failure, and this experiment was my failure of the day.
I had really been looking forward to trying this one out for a while, and it finally seemed like I had the right program for it. I never do an experiment with the G3 crew that I haven’t tried myself first, so of course I tested this one out. On my own, the experiment was actually a great success. However, the day of the program, I think I made a critical mistake. You first add vegetable to your cup, and then slowly squeeze some baby oil into the cup to top it off. I had pre-poured some baby oil into cups for my scientists, so on the step where we add the baby oil to the vegetable oil, I think we ended up mixing the two liquids too quickly instead of carefully keeping them in two layers. Given enough time (like 24 hours), our layers would likely have separated enough for the experiment to work. However, we clearly just did not have enough time to complete it during our program hour in the manner we did it 😦
This is a really fun experiment when talking about density because you get to prove that water in its liquid form is actually MORE dense than water in its solid ice form. Kind of blows your mind when you think about it. I have a feeling I’ll try this one again some day…
I knew I had to plan something special for the first G3 program of 2015…and during a school vacation week no less! What better than a program that brings our scientists close to something they know and love so well: CANDY.
My scientists loved this program when we did it back in September of 2013. At that time, I designed the program to include some videos about how some popular candies are made (e.g., M&Ms, marshmallows, cotton candy). If you’re interested in seeing those videos, they are linked to the post from my previous program.
Candy Experiments 2 by Loralee Leavitt
Candy Experiments by Loralee Leavitt
Part of my inspiration for doing this program was that Loralee Leavitt just released a followup book to her original Candy Experiments book. The majority of my experiments still came from the first book, but I was able to put some fun twists on things thanks to suggestions from her newest book. Her second book would be a great take-home for any budding scientist looking for some fun science fair project ideas (or for some fun science exploration at home) since many of the projects span a longer time frame that I am able to accommodate during my one-hour program time. As a reminder to my home readers, there is also a fun companion web site with some online experiment instructions. And as always, one of my favorite science fellas – Steve Spangler – provided some fun experiment suggestions as well…
THE EXPERIMENTS
We had an ambitious list of experiments that I wanted to do for the day, so I didn’t even bother creating a presentation with youtube videos and the like (which I usually do) Instead, we jumped right into the experiments themselves. WARNING: SOME PEOPLE HAVE ALLERGIES TO NUTS, AND MANY CANDIES CAN BE LITERALLY LIFE-THREATENING BECAUSE THEY EITHER CONTAIN NUTS OR POSSIBLY COME IN CONTACT WITH NUTS DURING PRODUCTION IN FACTORIES.BE SURE TO READ CANDY PACKAGES CAREFULLY – AND WHEN IN DOUBT, CALL THE MANUFACTURER! One of the most important rules for scientists is “be safe!” Thus, all of our G3 scientists wore latex-free and powder-free nylon gloves to protect their hands, lab coats to protect their bodies, and special instructions to be careful about where there candy was at all times. None of my scientists that day noted allergies to nuts and/or other foods, but I wanted them to be aware of the need for caution when working with food regardless.
Gobstoppers candies, several colors per scientist (I ordered some Wonka gobstoppers from Amazon.com)
Starlight mint candies, 1 per scientist (I used both the green striped and the red striped candies)
Plates (must be able to hold liquid)
Some water (I distribute recycled bottles filled with water amongst my tables for the kids to use throughout the program)
NOTE: Starlight Mints are NOT safe for kids with nut allergies – they are produced in a factory where they can come into contact with nuts!
We definitely did not get enough time with this cool experiment back in 2013, so I put it top of my list for this month. This “color mixing” experiment produces a really cool effect. Gobstopper candies are created with many different colored layers. As you suck on the candy, each layer dissolves to reveal a different colored layer underneath. Manufacturers need to make the sugar candy coatings of various colors in a unique way to ensure that the colors don’t mix during production and stay separate.
We tested this by placing gobstoppers of different colors into a small paper plate with a layer of water in it. You want the gobstoppers close but not touching – about 1-2 inches apart. The color coatings quickly dissolve, but it’s like there’s an invisible wall between the colors. The red doesn’t mix with the purple, the green doesn’t mix with the yellow, etc. At least for a time, all of the colors stay completely separated!
Using the same plate, my scientists then put one each of the green and red striped starlight mints into the same plate/water. When the Starlight mint is placed in the water, the candy actually dissolves in stripes! The red and white stripes (or green and white stripes) stay separated for a time due to the variance in the sugar content in the surrounding water as it dissolves.
FLOATING LETTERS
Materials:
Snack sized packs of M&Ms and Skittles (or you can just make sure that you portion the candy in a way that each scientists gets several of each)
Small, clear cups (I used the Diamond mini-cups that I found at Wal-mart)
Some water
NOTE: M&Ms are NOT safe for kids with nut allergies, but Skittles ARE.
Our scientists dropped some Skittles and M&Ms in a small cup filled with room temperature water, letter-side up. Over the course of 5-10 minutes, as the colored candy coatings started to dissolve in the water, the letters on the candies (either “s” or “m”) slowly separated from the candies and floated to the surface of the water! The candy makers actually use an ink that is NOT soluble in water to write the letters on the candy; in other words, the letters don’t dissolve in the water – they stay intact!
Pipettes (I LOVE pipettes! You can use them for so many things; I buy them in bulk from Amazon)
Water
Chromatography is a term used to describe the separation of mixtures, usually with the help of a fluid. And that’s just what we wanted to do. The purpose of this experiment was to discover what different colors are used to make the black coating for black jelly beans. Each scientist placed their black jelly bean on the filter paper, and then added water using their pipettes (eyedroppers). Then you just have to sit back and wait for 10-15 min. or so as the water starts to dissolve and separate the black candy coating. You can really see the colors on the filter paper best when the paper actually dries, so I sent all of my scientists home with their papers. But even before it dried, our scientists were seeing that blue, green, pink and purple were all colors that helped to make our jelly beans black. As noted on Steve Spangler’s site:
Although the black jellybean appears to be black, the dyes that comprise the color are actually many. You can see the different dyes as they move up the filter paper. These dyes separate from each other because some dyes are more attracted to the paper while others are more soluble in water. These differences result in varying distances from the jellybean.
WORMY COTTON CANDY + DEFYING GRAVITY WITH SLIME + THE COTTON CANDY SPONGE
Materials:
Charms Fluffy Stuff cotton candy packs, 1 per scientist (this is hard to find in stores, though I have seen some at the Dollar Store near me; this time around I just ordered from Amazon)
Plates (I used plastic plates since I had them in stock – you will be adding water to the plate so make sure it is sturdy/coated)
Small plastic cups with water in them
Small plastic cups with vegetable oil in them (there should be a couple of inches of oil in the cup)
Pipettes (see, I use them constantly! 🙂 )
Water
Back in 2013, one of my crew’s favorite experiments of the day was “Defying Gravity with Slime” using cotton candy. Thanks to Ms. Leavitt’s recent book, I was able to add two super fun variations to our experiments with cotton candy!
My first instruction was for each scientist to separate their cotton candy into four equal parts. Why four parts, you ask, if there are only three experiments? Well, my scientists are always obsessed with the idea of being able to take some cotton candy home with them…for eating. This ensures that they have a little chunk to take home with them 🙂
Cotton Candy Part 1: “Wormy Cotton Candy”
I asked the scientists to put one piece of their cotton candy down on a DRY plate (it is VERY important that the plate is dry since cotton candy reacts dramatically to water). Using a pipette, each scientist then slowly dropped water onto the cotton candy…drop by drop. The result is amazing! Wherever the water touches, it completely dissolves the fluffy cotton candy into a very small piece of gooey sugar water. By adding the water drop-by-drop with the pipette, each scientist can really see how this happens. It looks the way a piece of wood might if a worm was tunneling through! Some of my scientists carefully added water in a specific way so they could create their very own cotton candy sculptures. Others saw what was happening and squeezed a lot of water onto the cotton candy in one go so they could confirm how water really does dissolve it into almost nothing.
Cotton Candy Part 2: “Defying Gravity with Slime”
I now asked the scientists to take a fresh piece of the cotton candy and dip the bottom tip in the small cup with fresh water in it. And behold! The water travels lightning quick UP the cotton candy until all of the cotton candy dissolves into a dripping, sugary goo. How did this happen? Well, the sugar crystals and fibers of the cotton candy are so tightly woven that they create a stronger attraction for water molecules than even the downward pull of the force of gravity! Thus, the water quickly travels UP the cotton candy, dissolving the delicate fibers into goo. [The same effect can be seen when you touch a paper towel to water.]
Cotton Candy Part 3: “The Cotton Candy Sponge”
As far as I’m concerned, this experiment was the coolest – and yuckiest – one in the bunch. We know that cotton candy dissolves very quickly in water, but what happens when you dunk it into VEGETABLE OIL? For this final experiment, my scientists took the final piece of cotton candy and dunked it into the cup that had a few inches of vegetable oil in it. The result? The cotton candy does not dissolve! It actually absorbs the oil, turning kind of translucent and gelatinous-looking in the process. Yuck! Some of my scientists wanted to see what would happen if they took the gooey blob of cotton candy/vegetable oil and now dunked it in the cup with the water. What they discovered is that the parts of the cotton candy that had not fully absorbed the oil now dissolved in the water, but the majority of the cotton candy floated rather sludge-like in the water cup!
SNAP, CRACKLE, POP ROCKS + DEMONSTRATION “POPCORN POP ROCKS”
Materials for experiment:
1 pack of Pop Rocks for each scientists (Caution: Do not buy the Pop Rocks GUM…I learned that the hard way)
1 cup with water
Materials for demonstration:
1 pack of Pop Rocks
1-2 tablespoons of hot water (I just used a Keurig machine to put some plain hot water in a cup)
For the experiment, I had everyone sample some of the Pop Rocks by pouring some into their mouths and then describing what they were feeling/hearing. I then had all of the scientists pour some Pop Rocks into a cup of room-temperature water. We could hear the sound of the Pop Rocks popping all around the room! As the Pop Rocks dissolved in the water, they also bounced up and down in the cups. Pop Rocks have something in common with soda: carbon dioxide. Just as manufacturers compress carbon dioxide and pump it into soda to give us the fun fizz and bubbles, they also compress and pump carbon dioxide into the candy that becomes Pop Rocks. Pop Rocks candies contain many tiny pockets of carbon dioxide. As they dissolve on your tongue (or in a glass of water), those tiny pockets of gas are released with a small popping sensation (or sound).
I chose to do the “Popcorn Pop Rocks” as a demonstration only because ideally each child should wear safety goggles if they are doing this one (and I don’t have enough to go around a large group). I gathered our group at a safe distance from where I sat, and had them watch as I poured 1-2 tablespoons of HOT water into a clear plastic cup. [NOTE: This experiment works best with a small amount of hot water, so don’t overfill!] I then pour some Pop Rocks directly into the cup. The result? Pop Rocks exploded up and out of the cup! In fact, it was several hours post-program before I realized that I still had some Pop Rocks in my hair 🙂 Why does this happen? The hot water dissolves the candy of the Pop Rocks so quickly that the trapped carbon dioxide pockets literally explode as they are released.
SQUASH THE UNSINKABLE
Materials:
Mini 3 Musketeers bars (2 for each scientist)
Tall, clear plastic cups filled with water
NOTE: 3 Musketeers are NOT safe for kids with nut allergies.
First, our scientists dropped a mini 3 Musketeers bar directly into a cup of water. What happened? It floated! I then had them smash a second 3 Musketeers bar so that it was super flat, and then drop it into the same cup of water. [I originally told them to pound it flat, but the little candy bar was resistant to pounding, so I amended my instructions and told them to squeeze it flat using their fingers.] Did it also float? NO. 3 Musketeers bars are made with a lot of air – that’s why the nougat center is so light and fluffy. When you flatten out the candy bar, you push out a lot of the air that keeps it floating (or buoyant). [See our previous G3 post about buoyancy!]
UNSTICKY IT
Materials:
1 bag of campfire sized marshmallows (enough for 1 marshmallow per scientist)
A cup with some water in it (I just had the scientists use some water from the 3 Musketeers cup from the previous experiment)
I always save this final experiment for the end because it is super simple, super quick, and something that is easy to take off of the roster for the day if time runs short. I had the scientists rip a large marshmallow in half and describe the texture of the marshmallow in its center. “Very sticky” is how almost everyone described it. I had the scientists touch the sticky edge of a marshmallow center to the water in their cups and then describe the texture to me again. Many said it became “slimy” or “smooth.” The explanation? When marshmallows are made, the corn syrup molecules do not form complete crystals. When you first pull the marshmallow apart, the stickiness is the result of those molecules looking for ways to connect with other molecules. When you dip the sticky edge in water, the corn syrup molecules form bonds with the water molecules and thus no longer are clinging to your finger looking to create similar bonds!
When all was finished, my scientists left the room buzzing about the experiments…and eager to sample whatever candy they had managed to set aside during the course of the program 🙂
The Mad Scientists Club takes place each month at Cheshire Public Library from 4:00-5:00 pm in the Mary Baldwin Room. Registration occurs about 2 weeks before the program. Look for flyers at the library, or call the library directly for more details!


 I provided our scientists with pipe cleaners, google eyes, feathers, fun buttons, etc. (pretty much any fun supplies I could find in our crafting storage). Some artbots can be made using plastic cups and the like, but the beauty of the styrofoam pool noodle pieces is that decorating is a snap! For most supplies, all you need to do is push materials directly into the styrofoam – no glue or tape required. I did provide wet glue for items like pompoms, but most scientists quickly realized that waiting for glue to dry was no fun – it was so much easier to poke materials into the pool noodle. I personally find that pipe cleaners are invaluable – you can weave them through button holes, wrap them around pompoms – and as my super creative scientists discovered, you can even string tiny bells onto them! And the ends of pipe cleaners very easily poke straight into the pool noodles.


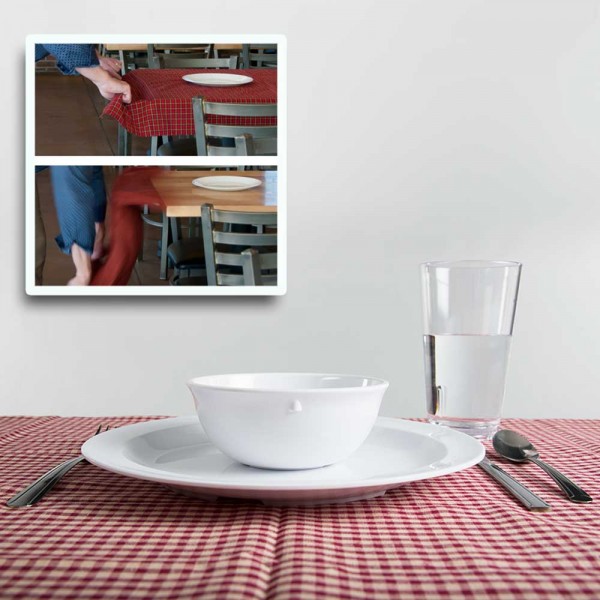
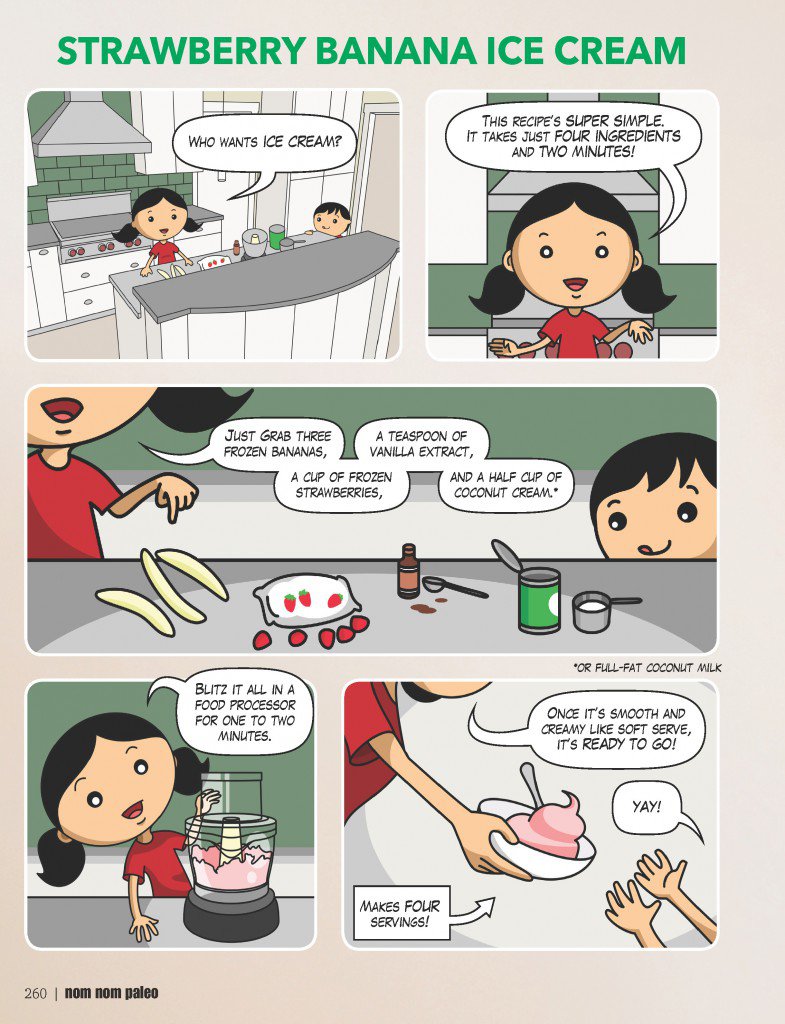


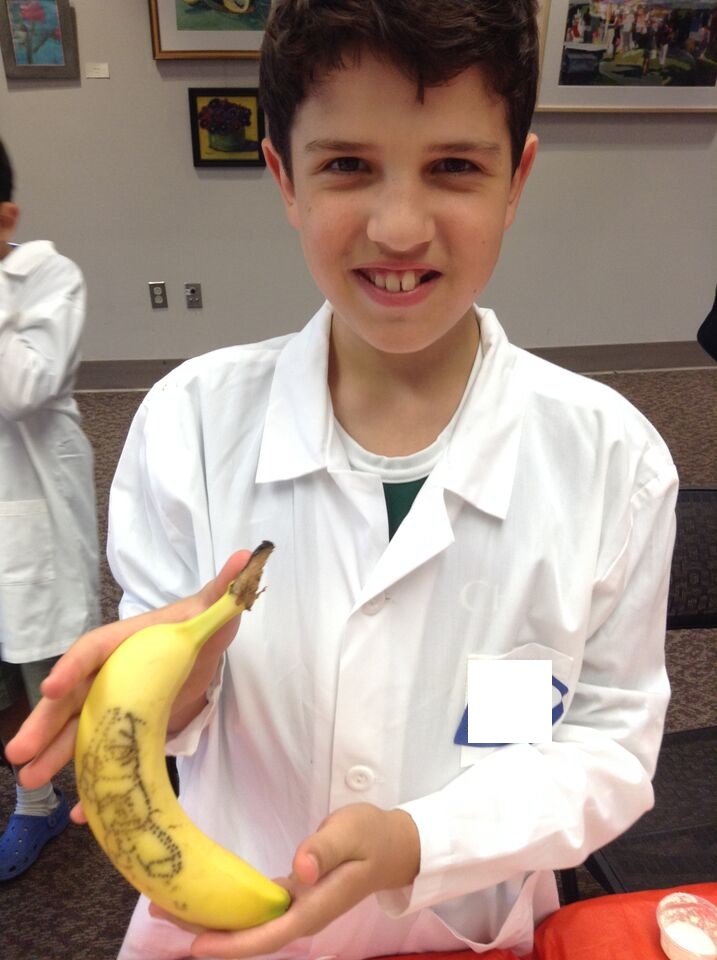


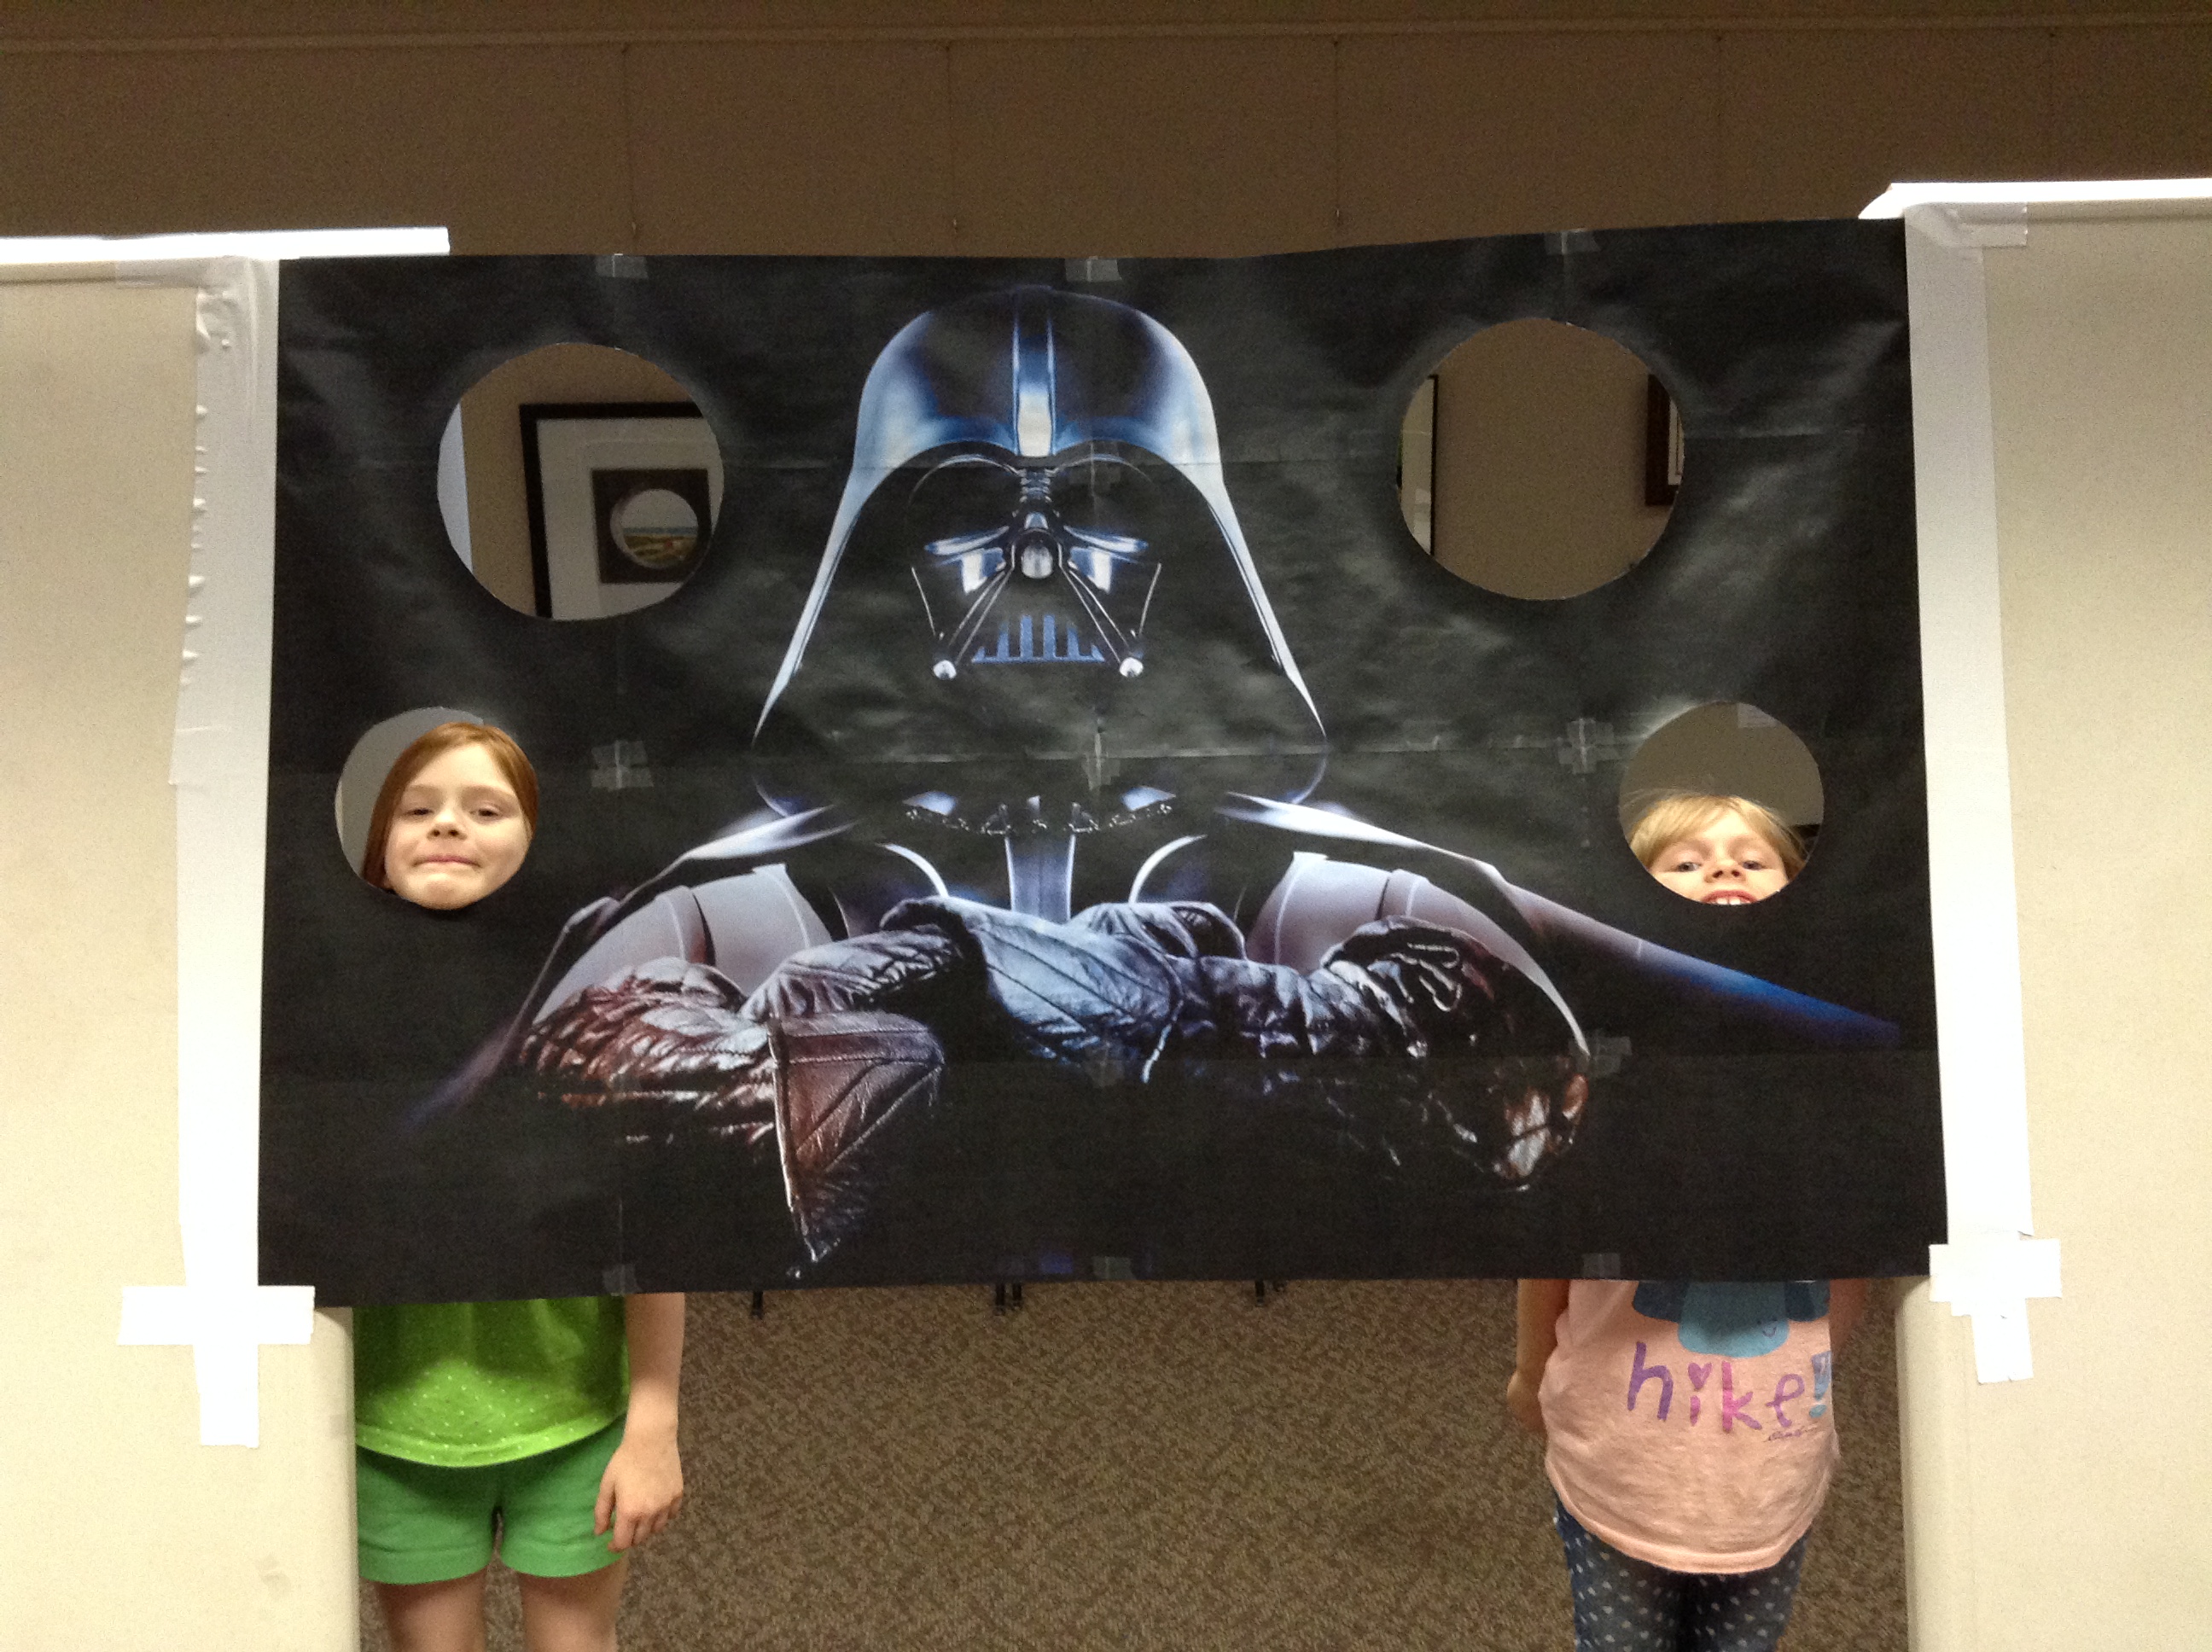


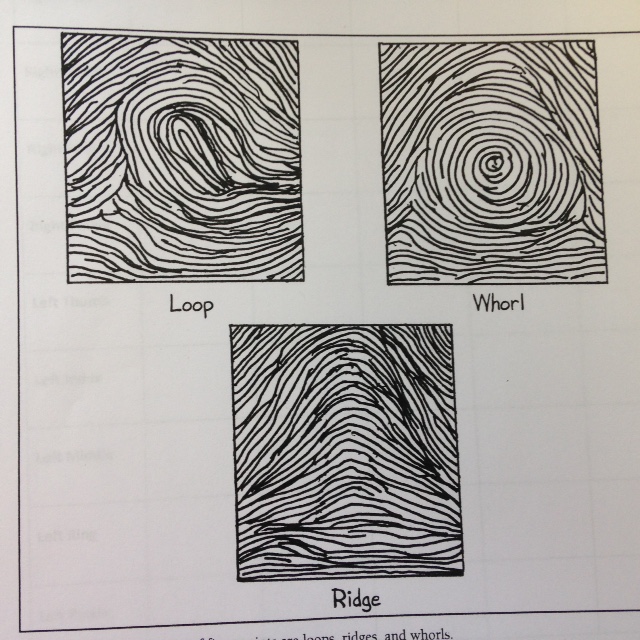


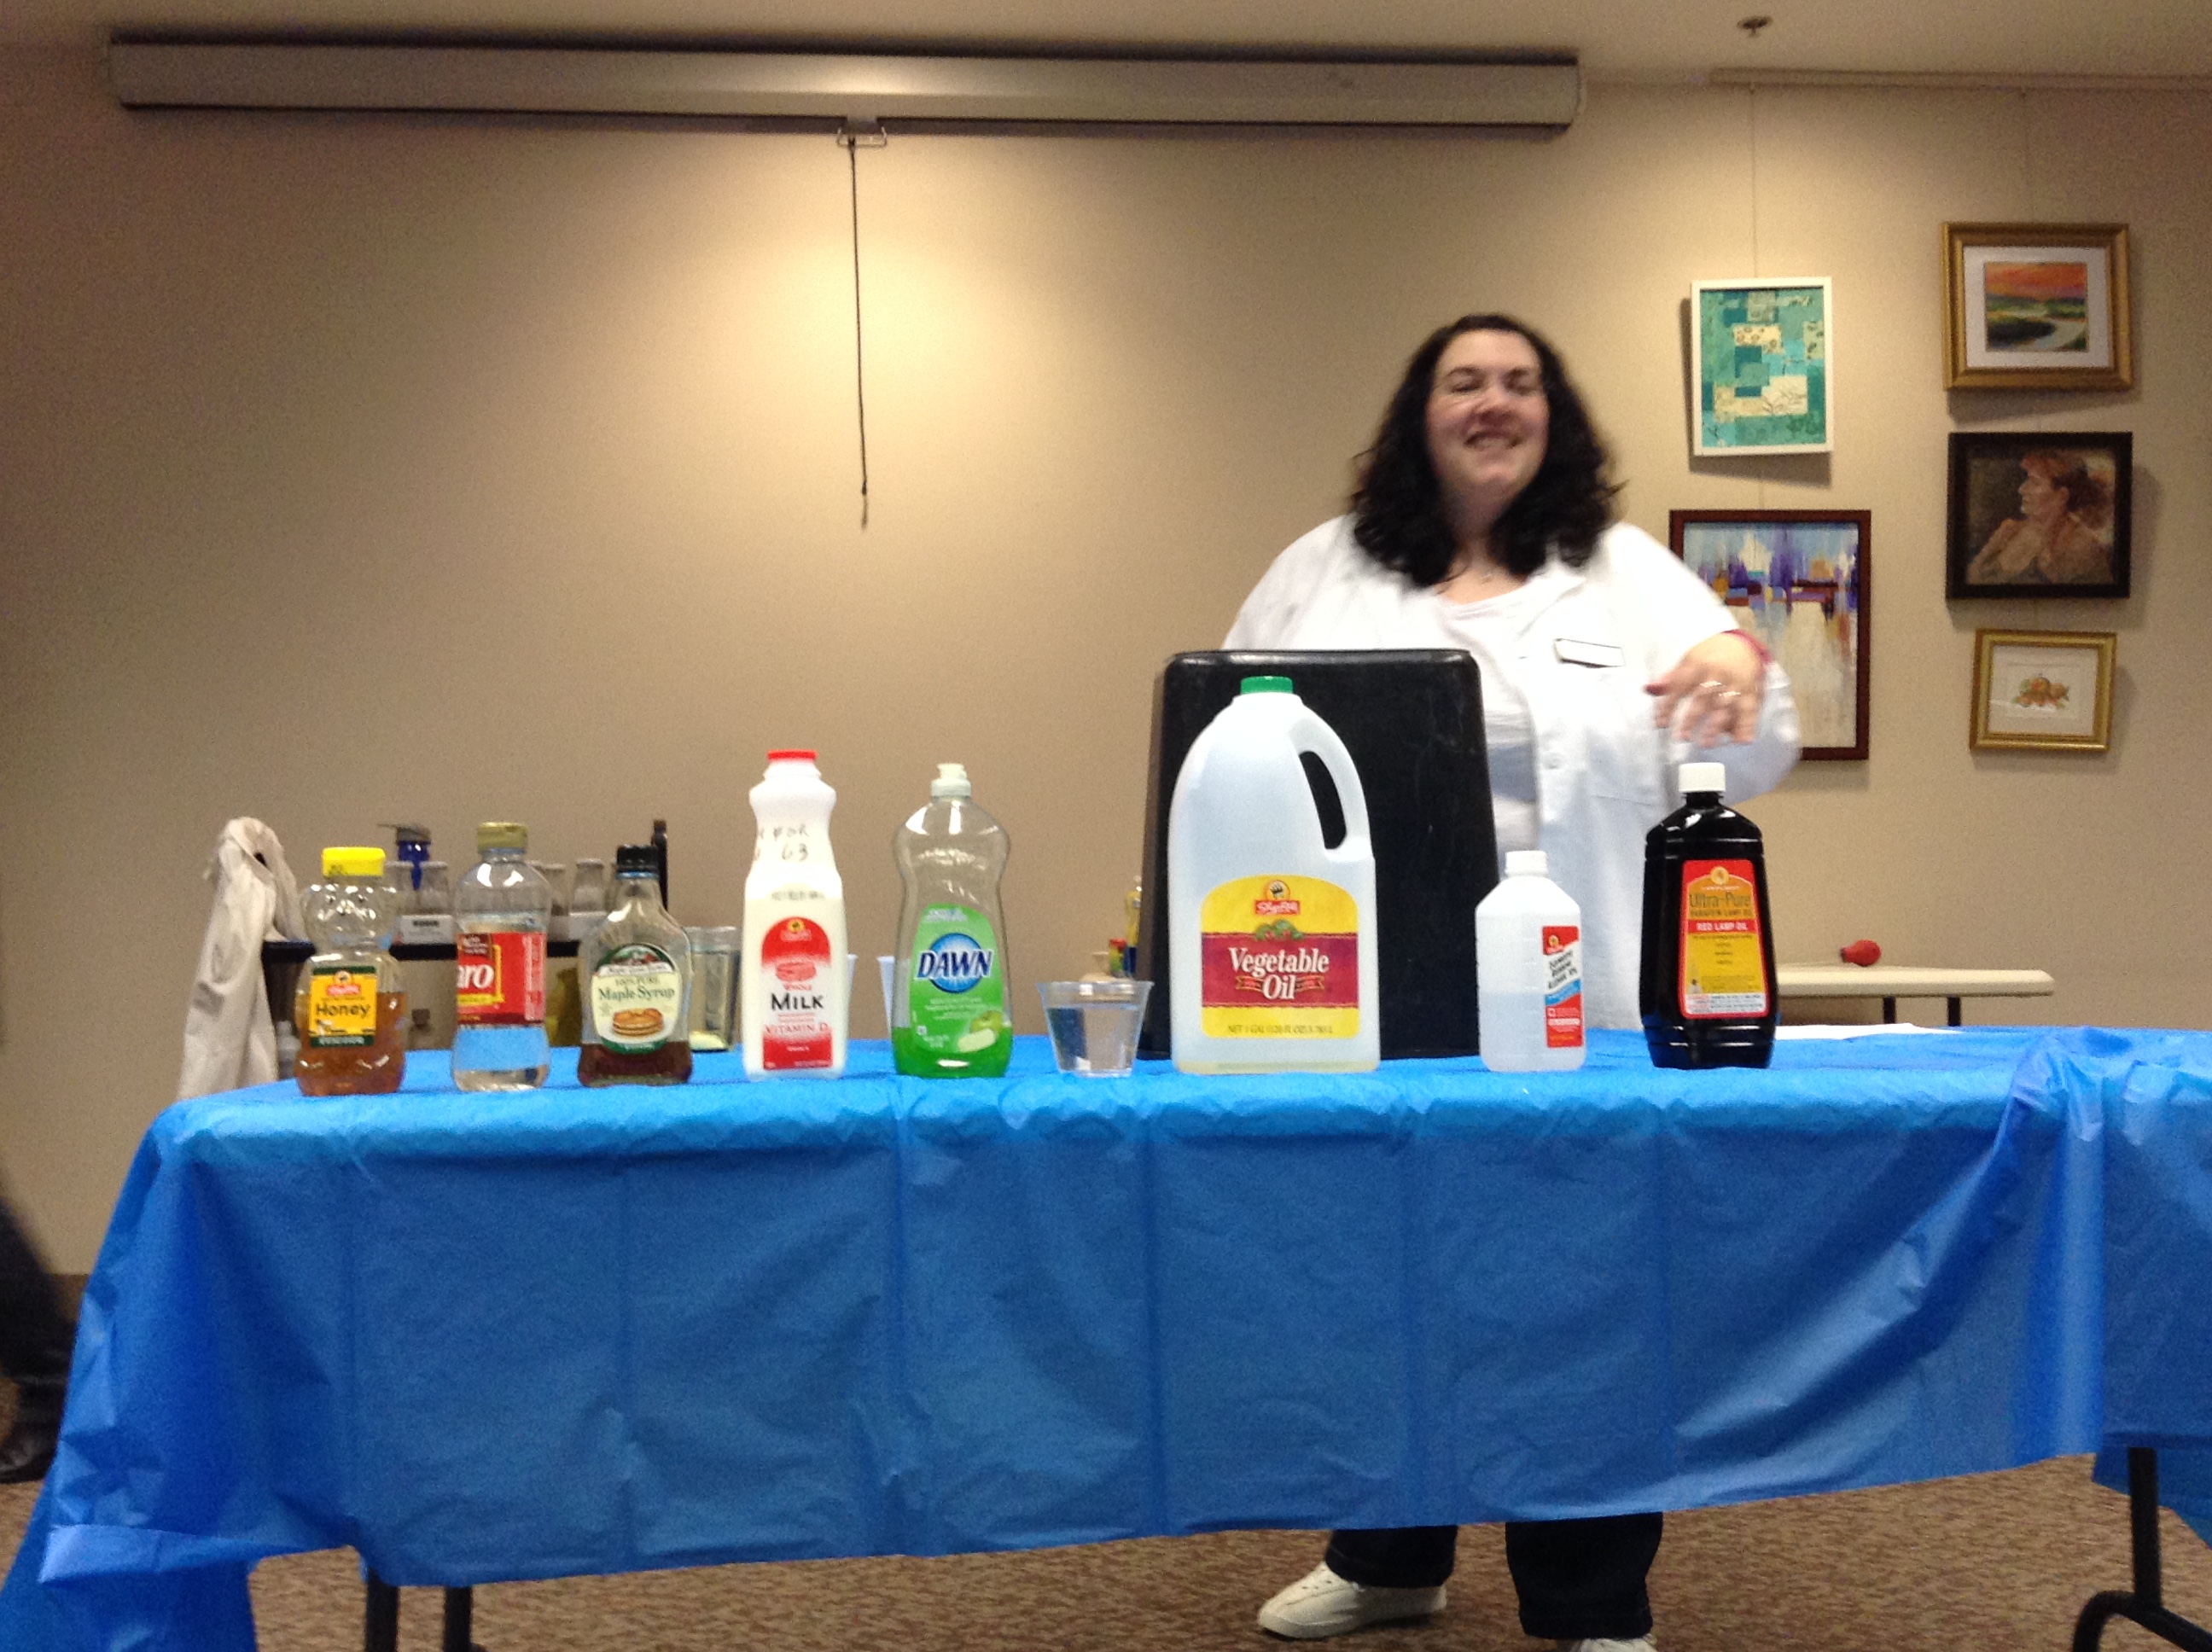
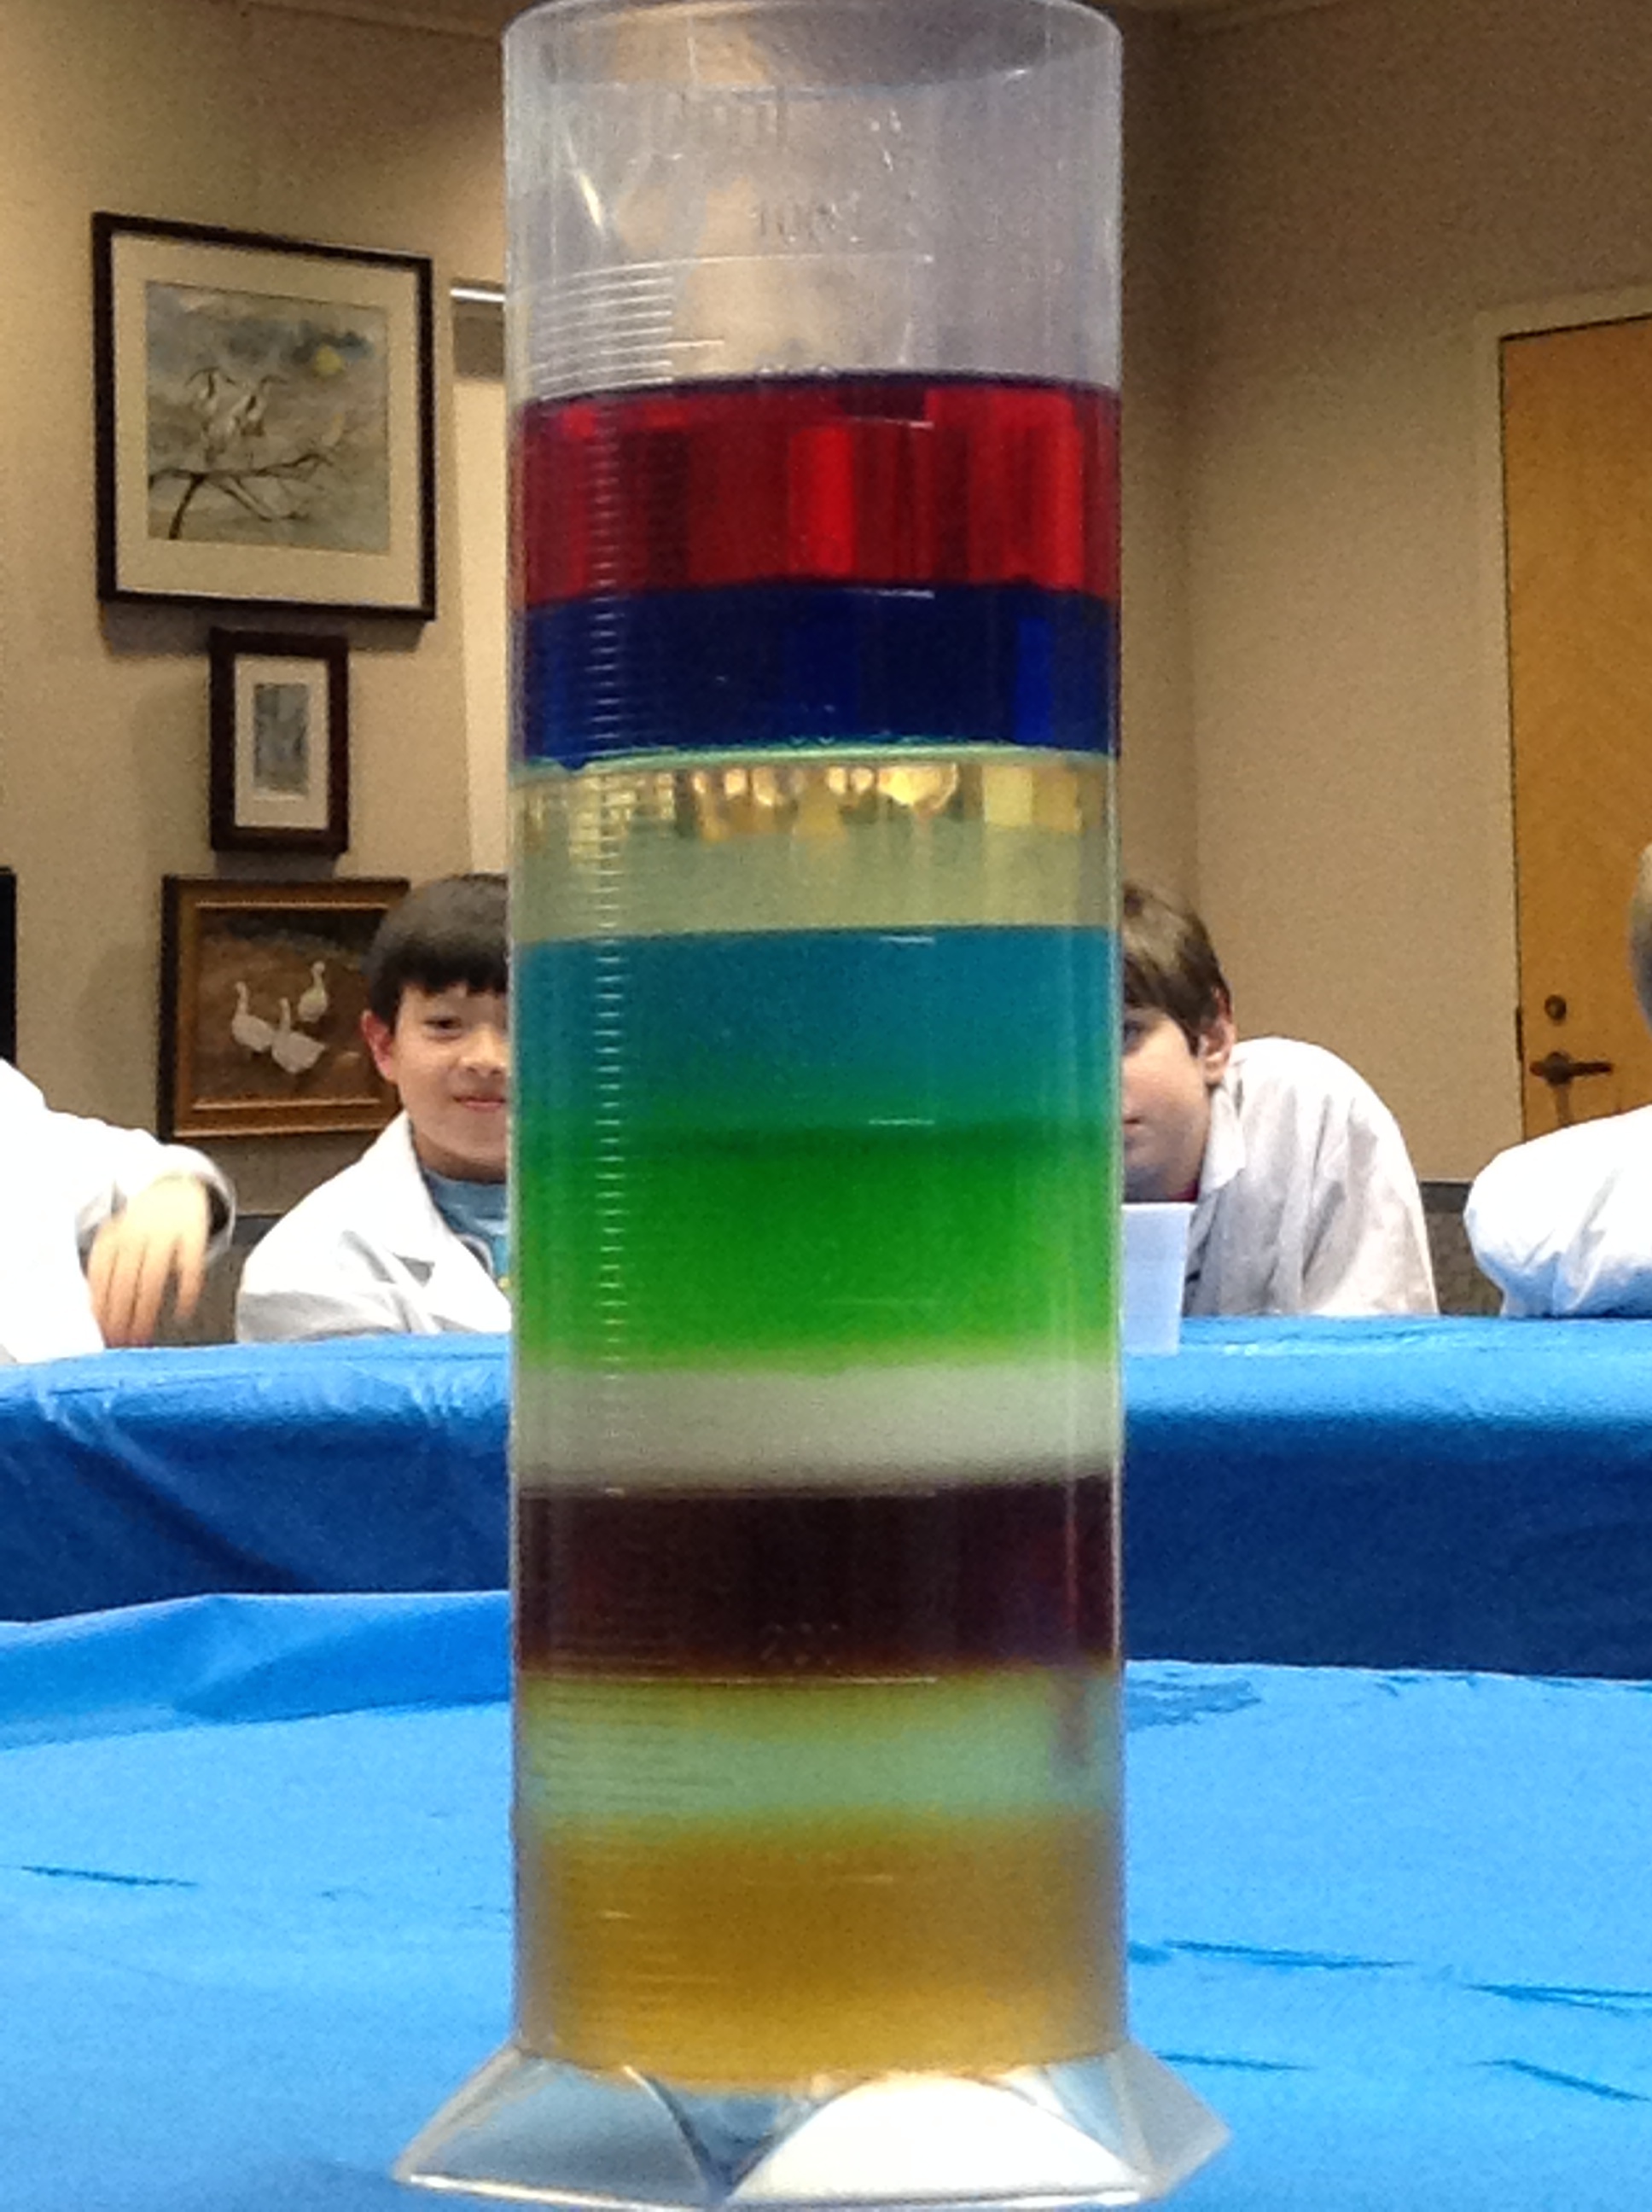


You must be logged in to post a comment.